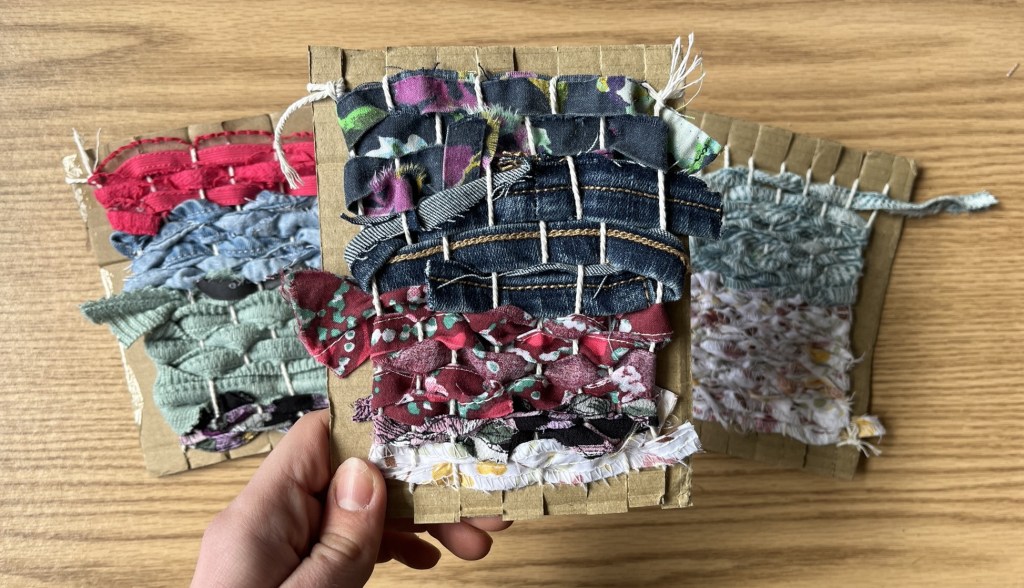
Weaving is a rhythmic craft that builds fine motor skills, patience and experimentation with colours and textures. It is a brilliant way to learn how textiles are made and these cardboard looms are perfect for introducing the techniques to children!
I love how simple to make these recycled cardboard looms are and the weaving is a great opportunity to use up some long, thin fabric scraps!
The weaving stage is perfect for children aged 6+ but it really does depend on the child’s dexterity and crafting abilities!
How the make a cardboard loom:
You will need:
- Recycled cardboard
- Scissors
- Ruler
- Masking tape
- Cotton string
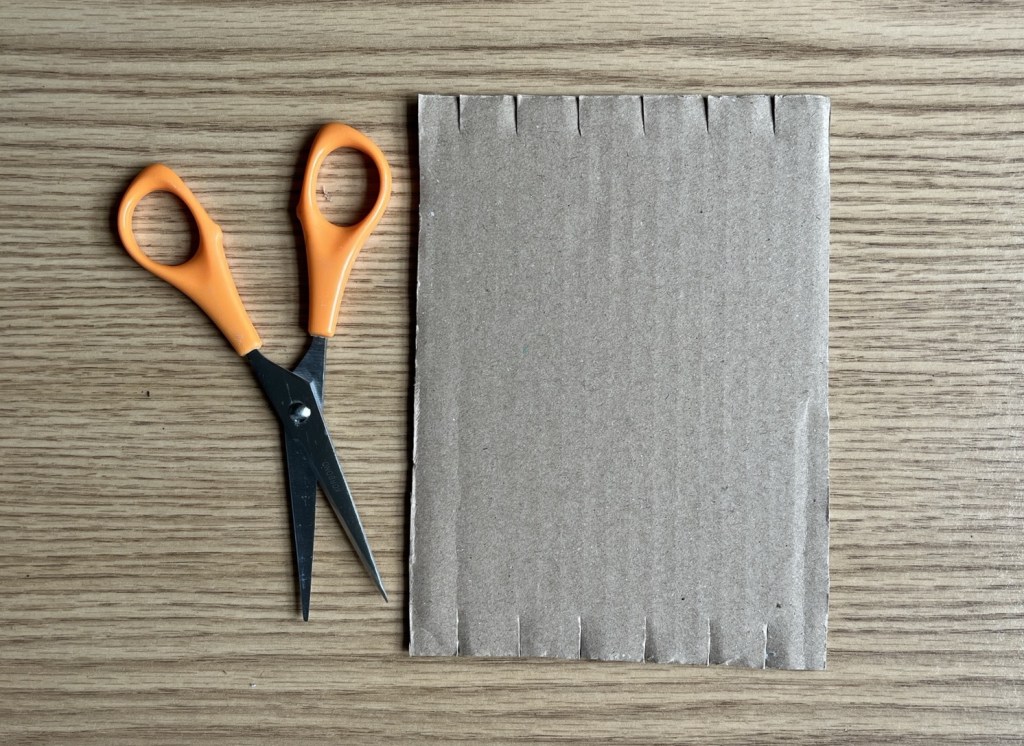
1. Cut a piece of cardboard to the size you would like your loom. Mine is approximately 11cm x 15cm. The bigger the loom, the more weaving it will take to fill it!
2. Cut 6 small slits along the top and bottom of the cardboard that are approximately 2cm apart.
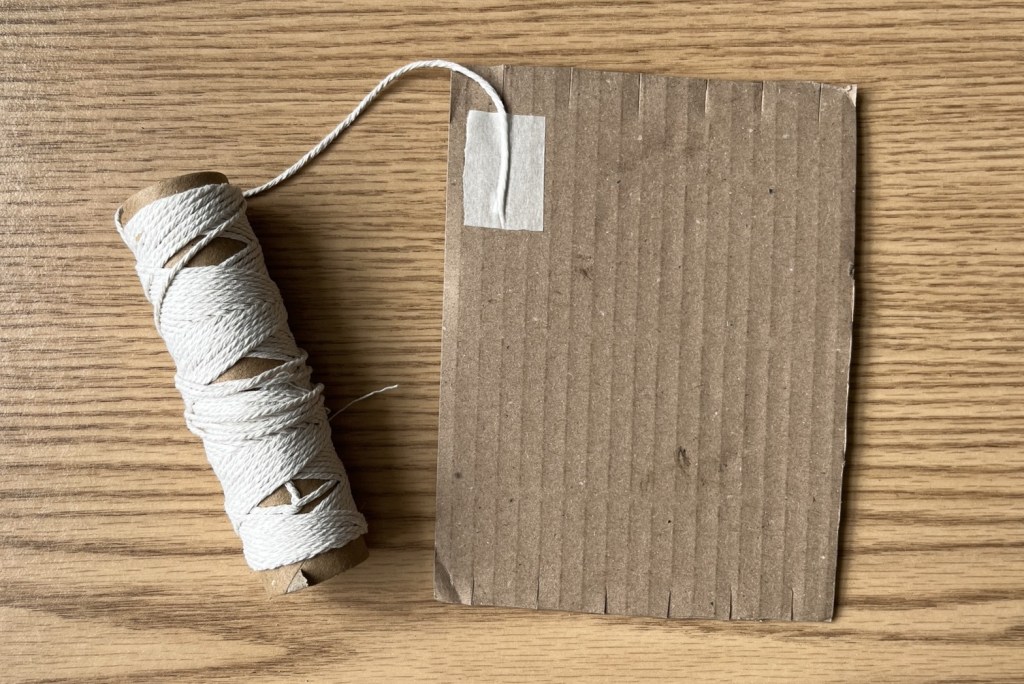
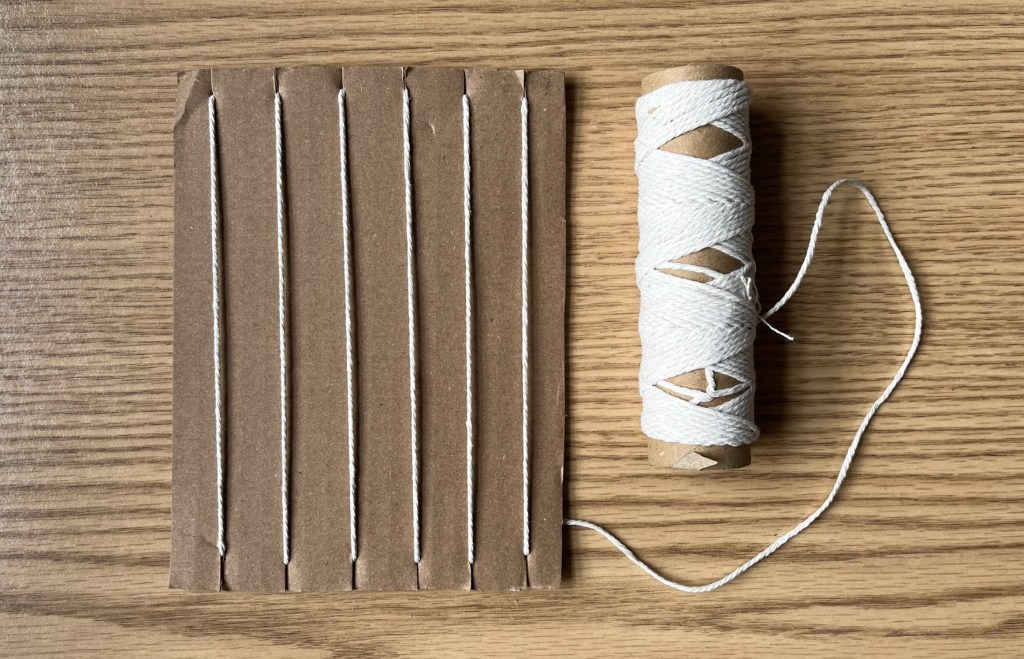
3. Take your string and tape the end of it to the back of the loom. Guide it into the first slit at the top of the loom then down to the corresponding slit at the bottom. Move along to the second slit and repeat this up and down process all the way across the loom.
4. Once complete, cut off the excess string and tape the string tail to the back of the loom.

5. Cut two thin rectangles of cardboard that are the same width as you loom. Slot them under the string lines and push one to the very top and one to the very bottom of the loom. This will push up the string and make it easier to weave.
The loom is now ready to weave on!
Weaving on the cardboard looms:
Weaving is super simple- you take a strip of fabric and go under and over the string lines on the loom. Once you reach the edge of the loom, take your fabric strip all the way round the last string to turn it around, then carry on weaving the other way!
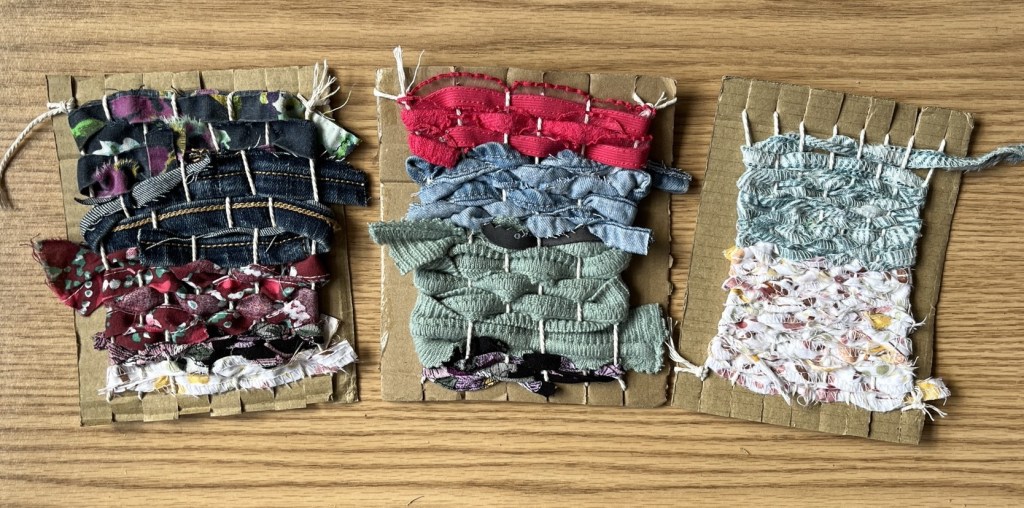
You can weave any materials you like! It’s a great opportunity to experiment with different textures, patterns and materials.
I cut up lots thin strips of scrap materials in different lengths to have a play with. This included hems of clothing, offcuts of fabrics and straps off clothing. This gave a real variety to the pieces produced and more opportunity for experimenting.
Top tips:
Remember the end of your fabric strip isn’t tied in place so don’t pull the fabric strip too tight of the first turn or it may pull off the loom.
As you move up the loom, be mindful not to pull the fabric strips too tight otherwise the string will pull together and form an hourglass shape.
Removing the weave from the loom
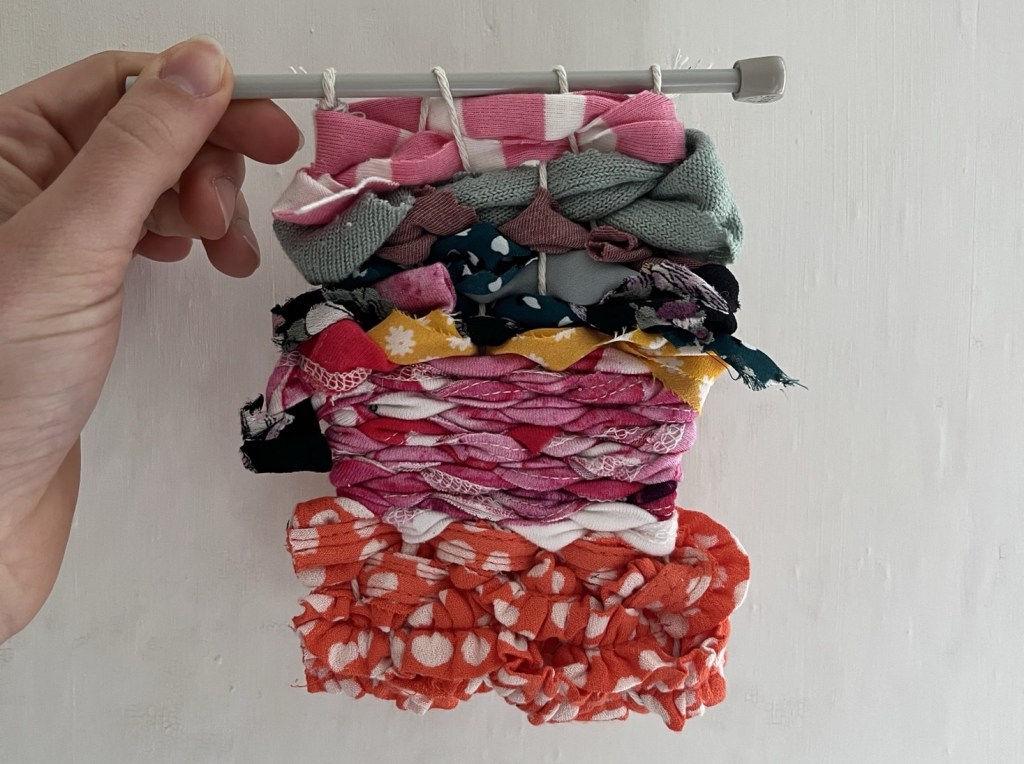
Why not remove your weaving from the loom and create a hanging decoration? I’d recommend an adult doing this step.
Make sure you have filled your loom as much as possible. Loose ends of fabric sticking out the sides are fine but ensure the last piece of fabric used has been woven back and forth for at least 3 rows.
Go to the end of the loom where the string ends are taped in place. Push the weaving away from this end to give yourself more room.
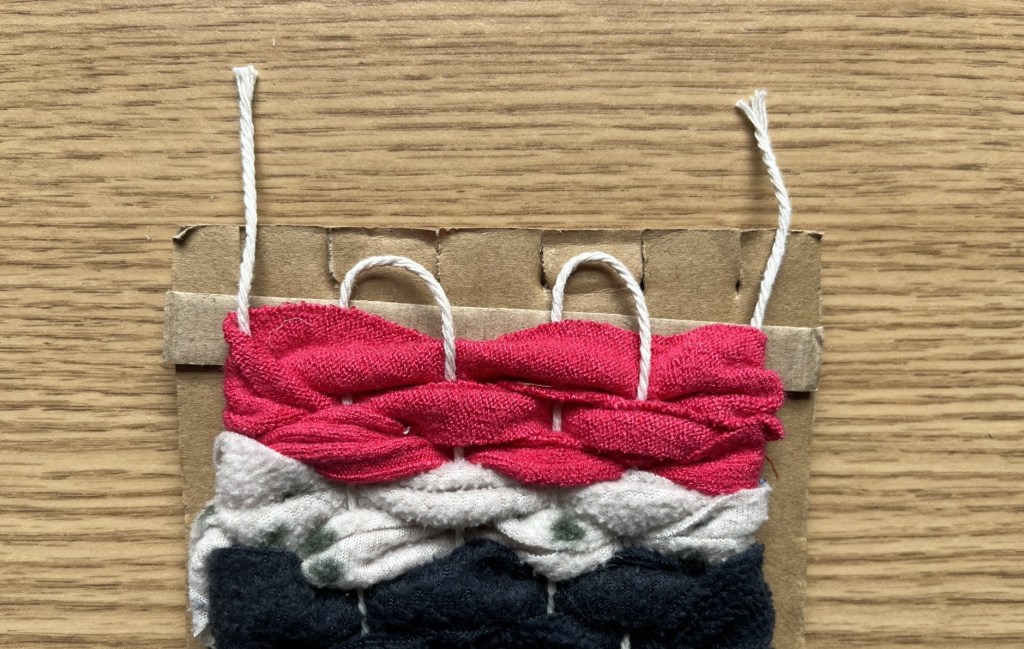
Take the tape off the ends so they hang loose. Then carefully remove the string loops, which were made when you wound the string onto the loom, from the end of the loom.
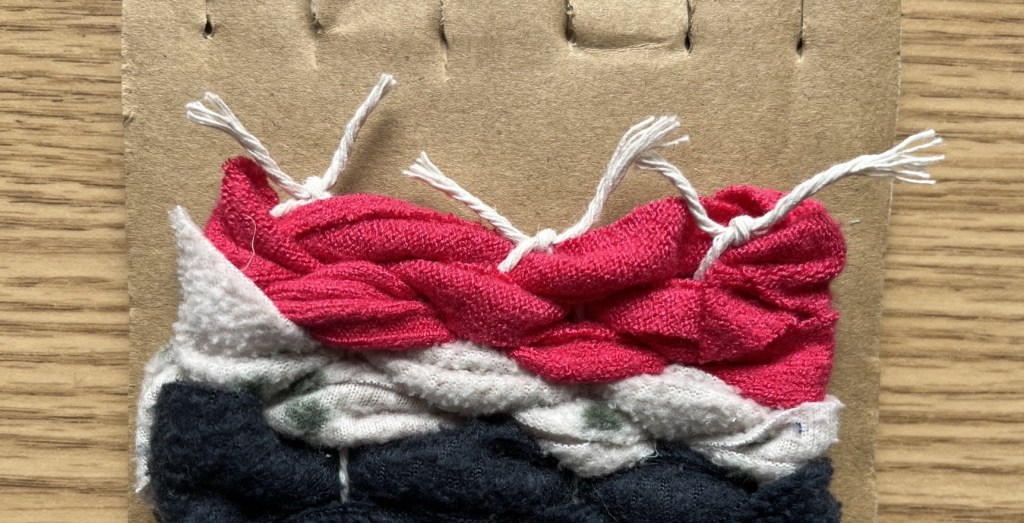
Cut the loops so you have 6 loose strands of string. Be very careful not to lift up the loom at this point or all your weaving will slip off the strings!
Tie each strand to its neighbour. This will create 3 tassels.
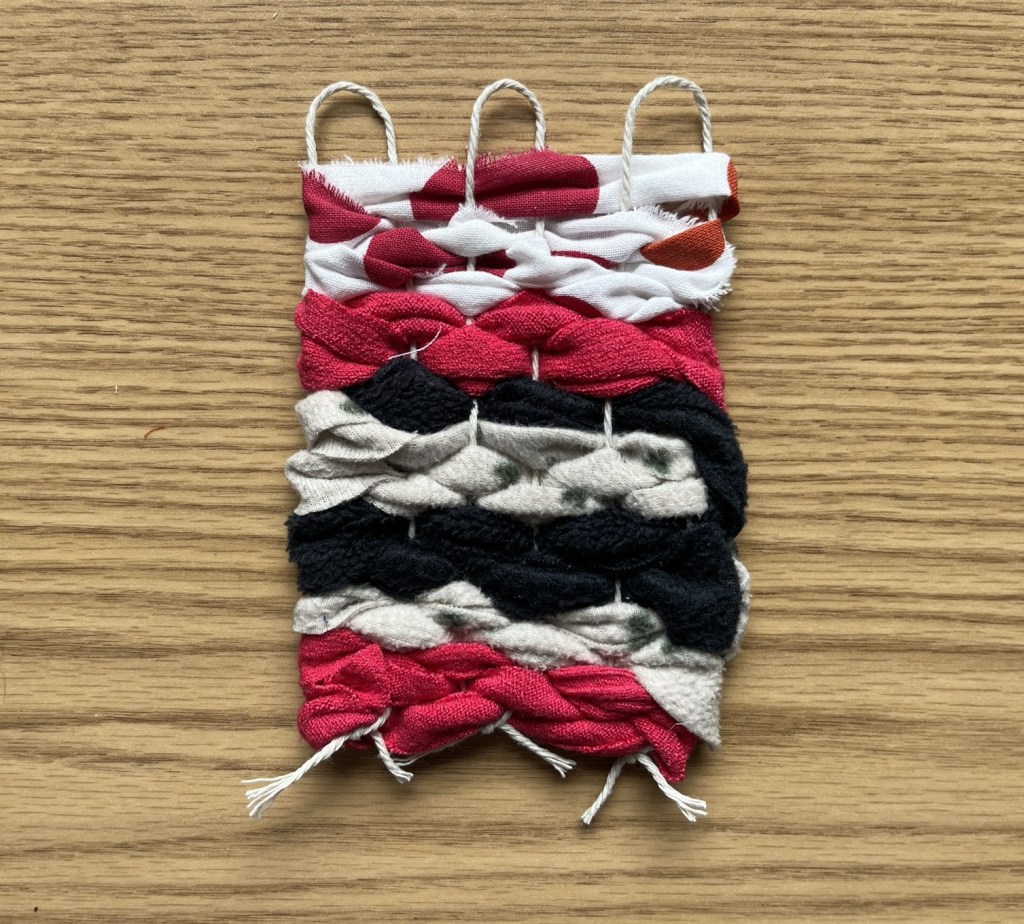
Move to the other end of your weaving and remove the string loops from the loom. Since there are no loose ends here you don’t need to worry about the weaving slipping off this end.
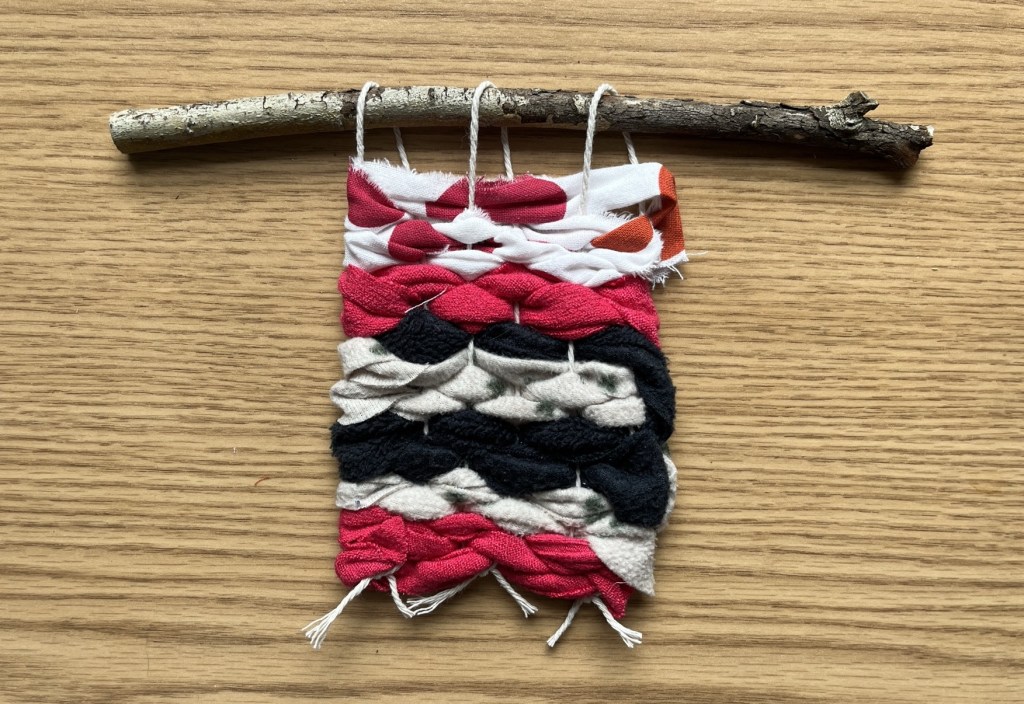
Thread a stick through the loops to hang your weaving from. You can also use anything else you have to hand to hang your weaving from, for example I used a broken knitting needle!
Alternatively, you could tie the ends together, like you did at the other end, to create a mug rug!
If you have a go at this craft please do let me know in the comments below!
x

Leave a comment